What to Do, and Who to Call First
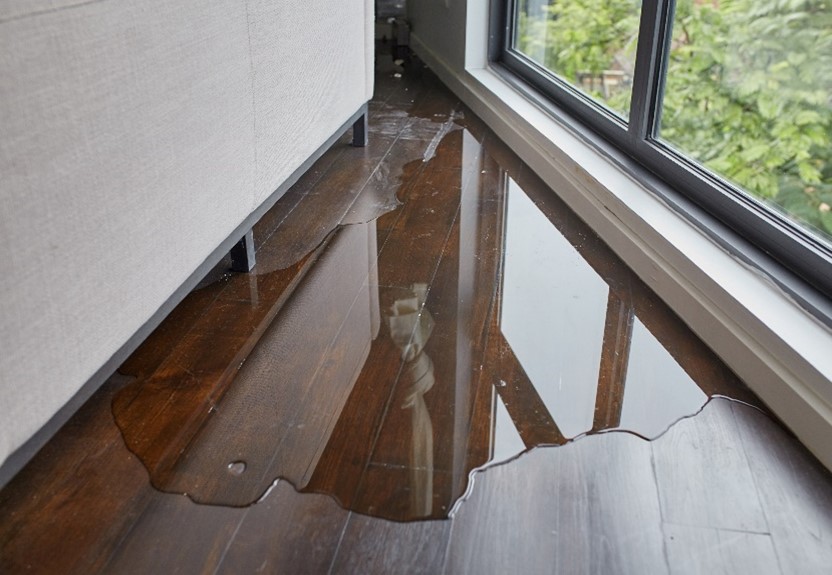
You discover a water leak in your condo and aren’t sure who to call. You have a duty to mitigate damage regardless of who bears responsibility for a condo leak repair. The short answer is that it depends on the circumstances. Whomever bears responsibility, it is the owner’s duty to mitigate leak damage before it becomes a major repair.

- Scenario one. You’ve isolated the source and scope of the leak to your unit. In this case, you are responsible for calling a plumber and making repairs.
- Scenario two. Water has seeped from your unit into the Association’s common areas.
- Scenario three. Water is coming from or has seeped into an adjoining unit.
In scenarios two or three, you should immediately notify your Association’s property manager. The Association may bear some degree of responsibility for the leak repair and water damage. You should still act quickly to mitigate damage. You can sort out the cost later, and the Association’s property manager can help with all these tasks.
As a condo owner, you are responsible for understanding your Association’s policies and condo leak repair responsibility and related damage.
While condo owners have individual insurance policies, owners also collectively pay for the Association’s master insurance policy. In many cases, the Association’s documents outline damages and repairs the master policy will cover. The owner’s insurance company and, in many cases, the Association’s carrier, should be notified. They can then work together to determine the extent of coverage each carrier will tender.
Identify the source and mitigate damage – regardless of leak repair responsibility
There are basic steps you should take to identify the source, notify correctly, and mitigate further damage to your home and property.
- Locate the Source. To the extent possible, determine where the water is coming from. A leak may be inside walls, in sink plumbing lines, toilets, washers, angle stops, or from a hot water heater. If you’re unable to readily locate the source, determine the most likely culprit. Is it near a window? A ceiling leak could be from the roof or an upper unit.
- When to Notify the Association’s Property Manager. Most Associations are not responsible for an owner’s internal plumbing issues. However, it may be responsible for other, related damages caused by a leak. The Association’s responsibility list will reflect items that are the HOA’s versus an owner’s responsibility. Address this issue once you determine the location and extent of a leak. The Association’s manager should meet with you and inspect the damaged areas affected by water intrusion. A sink, toilet, or water heater leak are likely an internal issue. If you’re not sure, contact your Association’s property manager for help.
- Who Calls the Expert? Leaks in your unit are your responsibility, so you will need to call a plumber for repair. If the leak appears to be from a common area water line, call the Association’s property manager. Provide as many details as possible about the nature and location of the leak. Provide contact information for you and/or your tenant, as well as identify other affected other units. The HOA’s manager will coordinate repairs for a leak that appears to be an area or system of Association responsibility. Your Association’s manager can help in coordinating the appropriate expert responders.
- Call a Remediation Company. Specialists can remove damaged contents and begin the drying out process before a leak repair. The remediation company can keep separate reports for costs by individual unit when damage or leaks involve multiple units. This will make claim submissions easier for insurance companies to process.
- Notifying your Insurance Company. CC&Rs and water intrusion policies (if they have one) vary from Association to Association. As a unit owner, you may need to open an insurance claim and the Association may do the same. The unit owner(s) and the Association’s property manager will meet with the insurance adjusters and inspect the damaged areas. Insurance companies for unit owners and the Association will apportion responsibilities for repair. Repairs can begin after determining responsibility.
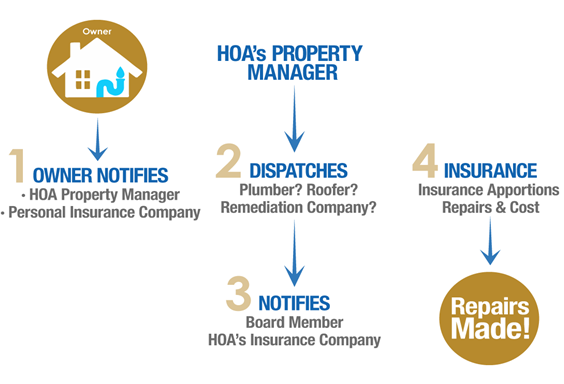
- Leaks Involving Multiple Units or the Association’s Common Areas. In these cases, notify the Association’s property manager for guidance. If your unit is involved, you can expect the following events to occur, as illustrated below.
- Document with Photos or Video. If you need to remove any personal belongings right away, make sure you document them with pictures or video.
- Consult a Mold Specialist. If you suspect you may have a mold problem, use caution if beginning mold removal on your own. We suggest calling an expert. Disturbing mold increases the likelihood it will spread throughout your home. Exposure can create a health hazard for you and your family, and repair technicians. A certified mold specialist will also be able to ensure mold is removed before remodeling begins. Notify your Association’s property manager before taking any action if the problem appears to affect common areas or multiple units.
- Remove Damaged Personal Items:
- Saturated furniture – discard.
- Saturated carpet – remove and discard. For easier removal, cut it into manageable sections with a box cutter or knife. Roll up the sections, leaving the carpet pad, and then cut the pad into strips and dispose of them too. Carpet is held down by wooden tack strips — thin strips of wood lined with hundreds of upside-down nails. Remove these with a chisel and a hammer.
- Mill work and Sheetrock – remove and discard mill work such as baseboards. Remove wet Sheetrock and any wet insulation behind it.
- Cabinetry. These may need removing if water has seeped underneath. Removal depends on how much water the cabinets were exposed to. To determine leakage, drill or cut into the toe kick. This is the bottom-most recessed part of the cabinet that sits on the floor. Drilling holes will allow air to flow under the cabinet to allow more air for drying. These holes are a pretty easy patch later.
- Flooring. Tile or hardwood floors may look and feel dry on the surface, but this doesn’t mean they’re completely dry. A layer of roofing felt placed between the plywood sub floor and the hardwood flooring. Machines suction water through the floors without having to remove them. You may need to remove hardwood flooring or tile if this effort is unsuccessful.
The speed in initially addressing the problem will determine the extent of the damage and the ultimate cost of repair. Your HOA’s manager can help provide answers and guidance if you have any doubt about how to proceed in any step of the process.
Your HOA manager will help coordinate remediation and repairs if the Association bears responsibility, which will relieve you of much of the burden.